Showing posts with label pottery barn. Show all posts

Pottery Barn Inspired Buffet


Each Christmas, my husband likes to make me a piece of furniture.  This year we wanted some sort of table behind the couch.  We thought about a simple, two shelf table that would display some scales, apothecary jars, etc., but then decided that a buffet with much needed storage for extra dishes would be perfect.  We were in Pottery Barn and saw this piece and were inspired.

We loved the look of it, but it was too tall for our needs.  Well, with a husband who can make just about anything, that really wasn't a problem.  He made a piece that works perfectly for us.


He made this out of pine, as we love the look of it.  It took him about three weeks start to finish.  In those three weeks, we had Christmas, he has a full time job that does not involve woodworking, and we had two snowstorms that dumped over two feet of snow on us!  (meaning, snowblowing before woodworking on several days).  He is so dedicated to making everything perfect and getting things done!


He used Minwax Provincial Stain to get the dark color.


We ordered the feet from Osborne Wood Products and the handles/pulls from Pottery Barn.  


We wanted something different for the doors.  We looked at several types of wavy glass and beaded glass, but wanted the things inside the cabinet to be somewhat hidden.  So we came up with this:  We ordered eight pieces of glass and put these mesh inserts (from Hobby Lobby on sale for 41 cents each!) between the glass.  We are thrilled with the way the doors came out (even though it's proven almost impossible to get a good picture of them!) 


The drawers are made of maple and will hold my Mom's silver.  We've been using it quite a bit lately and absolutely love it!  It'll be nice to have all of the pieces so close.
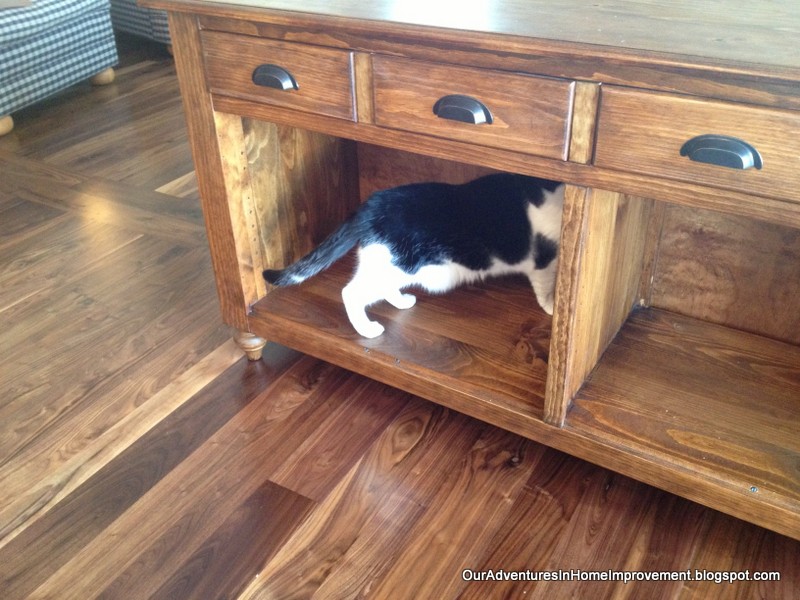

When we brought it in the house yesterday, without the doors on, here was Bailey to make sure everything was ok. 


We put the red scale on that my husband refurbished a couple of months ago, along with the Chelsea lamp and burlap shade from Pottery Barn.  And, the most important item on there is the little chocolate lab in memory of Max.  :)


I am so happy with this piece and can't wait to fill it up.
Thanks for your visit!
Pam


I am linking to the following parties:

 Debbiedoo's Newbie with a Twist
Common Ground's Be Inspired Party


DIY Show Off

Furniture Feature Fridays

Simple Red and White Christmas Table

I love seeing pretty Christmas tables.  I love gingham and plaid fabrics, especially in red.
 
Yesterday I was on a mission to find some dishes to go with some square white plates that I already had.  I was so excited to find these snowman plates from Pier 1.  They were exactly what I'd had in mind and were on sale to boot!


I used my Mom's silver, which I am so happy to have. 
 
 
I was thrilled to find the gingham napkins, pretty bell napkin rings and plaid placemats at Pier 1 as well.
 
 
Even though we always sit in the same places at our table, I think the placecard holders are cute.


I used  a Santa that was my Mom's for the centerpiece and poinsettias in galvanized pots.
 
I'm trying to simplify my decorating this year.  I like how this  looks festive and was easy to do. 
 
Thanks so much for your visit!
 
Pam


I am linking to the following parties:

Debbiedoo's Newbie with a Twist Party


>

Burlap Table Runner--PB Look @ DIY Price


A few weeks ago I was in Pottery Barn and found a jute table runner.  I had been looking for one and was very happy to find it on sale.  I brought it home and it was way too big for my table.  I love the texture of jute, burlap, etc and kept looking for one, but didn't want to pay lots and lots.... Last night I saw this post by Kristen @ Ella Claire Inspired and was so excited to make a runner myself.
I went to JoAnn's today and bought 4 yards of burlap.  I followed Kristen's directions and it turned out great!
I started out by washing it with Tide and some bleach to get rid of the smell.  I had to do a second load with a little more Tide and two rinses.  It still smelled a little, but wasn't horrible.  I took it outside and draped it over some chairs for about an hour.  Before I brought it back in the house, I really tried to shake it out.  There were burlap fibers flying everywhere!  :)


I then did a rough measurement of it, pulled a string from it and cut carefully along that line.  I cut it down the middle with the same technique.  Because it was so long, the string broke a couple of times.  I put on my reading glasses (haha!) and used a pin to find the string and started carefully pulling it again.  Once I had it out, I again carefully cut lengthwise.  I made it about 20" wide by 90" long for my 80" table.


I ironed it with my eurosteam.  I tried to use a normal iron set on Silk, as Kristen did, but wasn't getting anywhere.  It came out nice and smooth this way.
I set it on the table and did a final measurement.    I cut it so it'd hang a few inches over the edge of the table.  After that, I carefully pulled about 8 strings off, one at a time, to make the fringe.  This part was really easy.


And that was it!! 
I paid $10 for the burlap and can make two runners.  $5 for a runner is perfect in my book!  It sure beats paying $50 for the one at Pottery Barn.  Thank you Kristen!
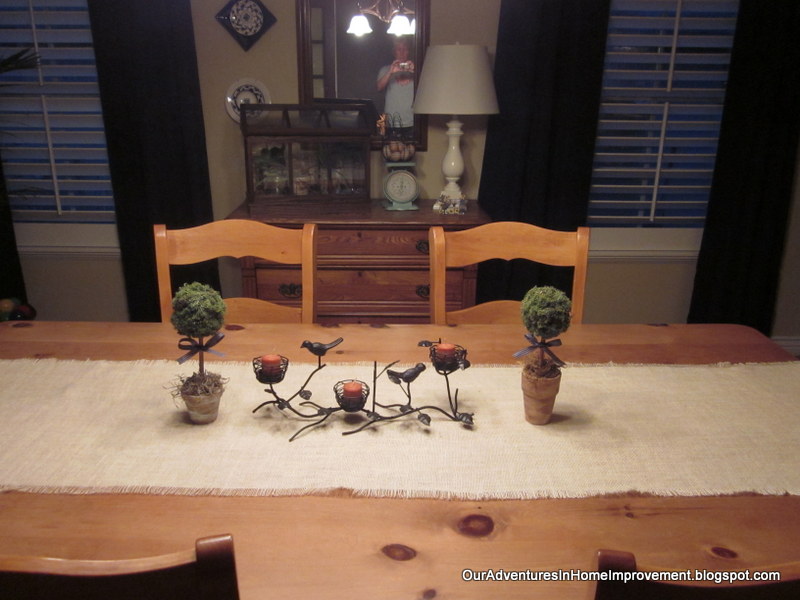
I was in Michael's today and found this bird/candle holder for 90% off. 
I added some topiaries that I made and now have a simply decorated table for fall.  Now if I can just keep the cat out of there....  :)

Thanks for your visit! 
Pam

If you're in the market for an air purifier, please visit my Sponsor:

Zadoozy iQAir Purifiers


I am linking to the following parties:


The DIY Show Off's Project Parade


>
TDC Before and After
>
"


Funky Junk's Saturday Nite Special

Hooking a Friend Up

Last summer we took at trip to the Palm Springs area to visit friends.  My friend and I were shopping at Pottery Barn and found these numbered hooks on sale.  I was thrilled that the numbers 1-4 were available.  I wasn't sure where I'd use them, but loved how crisp the numbers were and how sturdy the hooks were.


 They stayed on a shelf until right before Christmas.  I decided that the perfect place for them would be in my friend's house.

My husband cut a board and routed the edges.


 We painted it white and measured very carefully to space the hooks across the board.

Holes were drilled on the ends to attach it to the wall.


 And off it went with anchors to attach it to the wall and plugs to fill the holes.  She hung it today and says she loves it! 


I'm sure she'll play around with what to hang on it.  I think it looks great!
Thanks for your visit.

Pam

I am linking up to the following parties: